


Tutorials
Use 3D assets in


Free 3D Icons
Use Lottie animations in

Free Lottie Animations
Use Illustrations in


Free Illustrations
Use AI in
AI Images
Smart Tools
glTF 3D Editor
Edit and create stunning 3D Icons in no time
File Converter
Convert your graphic assets into various format easily
Illustration Kit Editor
Try our Illustration Kit Editor to experience endless design possibilities
IconScout API
Integrate highly-customizable design assets within your platform
How To Get Started With 3D Material And Texture In Blender
Back with yet another, blog series in our tutorials blog. Hope you enjoy this one as you did others. We will be back with many more so stay tuned.
We are not gonna just show you how to create 3D. Instead, what are the best parts of 3D that would make you fall in love with it! In case you are not aware of it, there are various techniques for drawing 3D objects. But they aren't easy to master, especially without the proper guidance, tools, and knowledge we make happen. Artists who create 3D objects and illustrations manually or through software have mastered the law of perspective, and now so can you.
How to get started with 3D material and texture in Blender? What are these? Before we get started, let us first define the material and texture. If you are new here, do not forget to click below and start your 3D Designing journey with Iconscout.

Material
A material defines the optical properties of an object: for instance, its color and how rough or shiny it looks.

Texture
It is a pattern that alters the uniform appearance of the material. Very rarely do we find entirely consistent surfaces in the real world.
Textures can be applied to any object. Let us see how we can apply them. Before getting started, we need two things:
- You can easily find free textures online. For the sake of this tutorial, we will be using Freepbr's old padded leather material.
- One object in the 3D space on which you can apply the texture on. Let us use a sphere here for this example.
Let's get started now, shall we?
Create The Sphere
Before we assign the material to an object, we need first to create a sphere.
- Let us start by pressing Shift+A in the viewport.
- Select "Mesh" from the menu.
- Further, under the sub-menu select "UV Sphere."
- After selecting the sphere, you will have a default UV Sphere in the viewport.

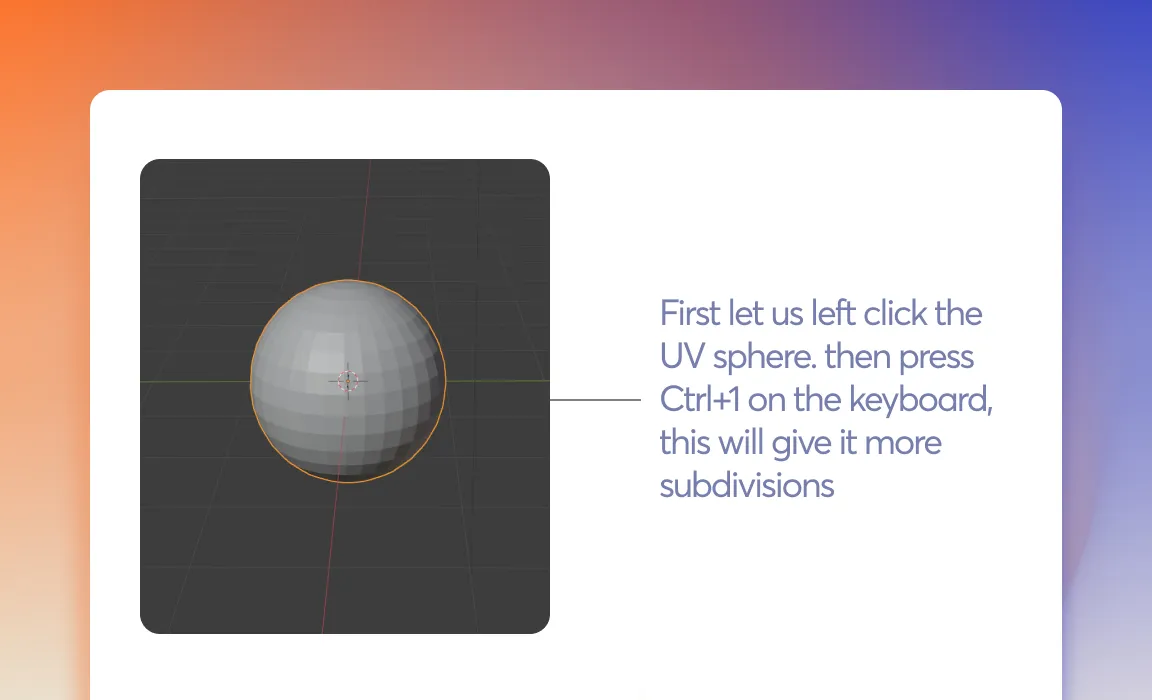
Smoothing the Sphere
This sphere is quite rough and blocky. Let us make this sphere even smoother for a much pleasing look.
- First, let us left-click the UV sphere.
- Press Ctrl+1 on the keyboard. This will give it more subdivisions.
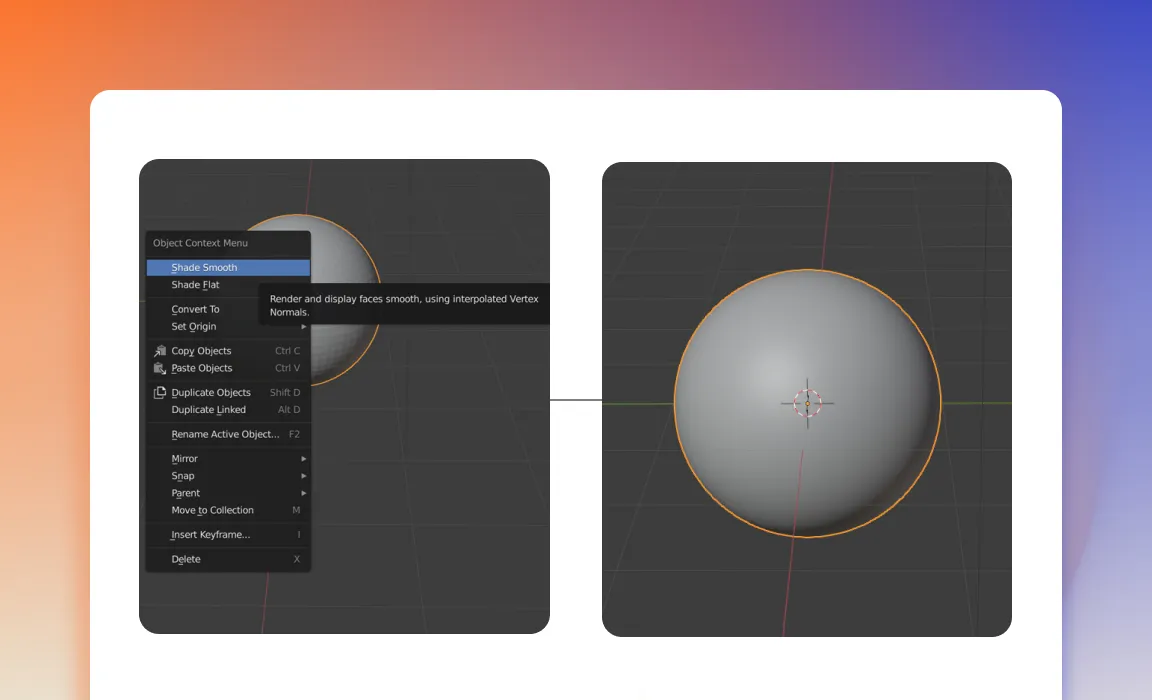
- Now right click on the sphere.
- From this menu, select the "Shade Smooth" option.
- Once done, you will get a smooth sphere.
- Now right click on the sphere.
Assigning the Material
Now that we have our smooth sphere ready. Let us assign a material to the sphere.
- Left-click on the sphere in the 3D space.
- Select the "Materials" tab located at the bottom right of the interface.
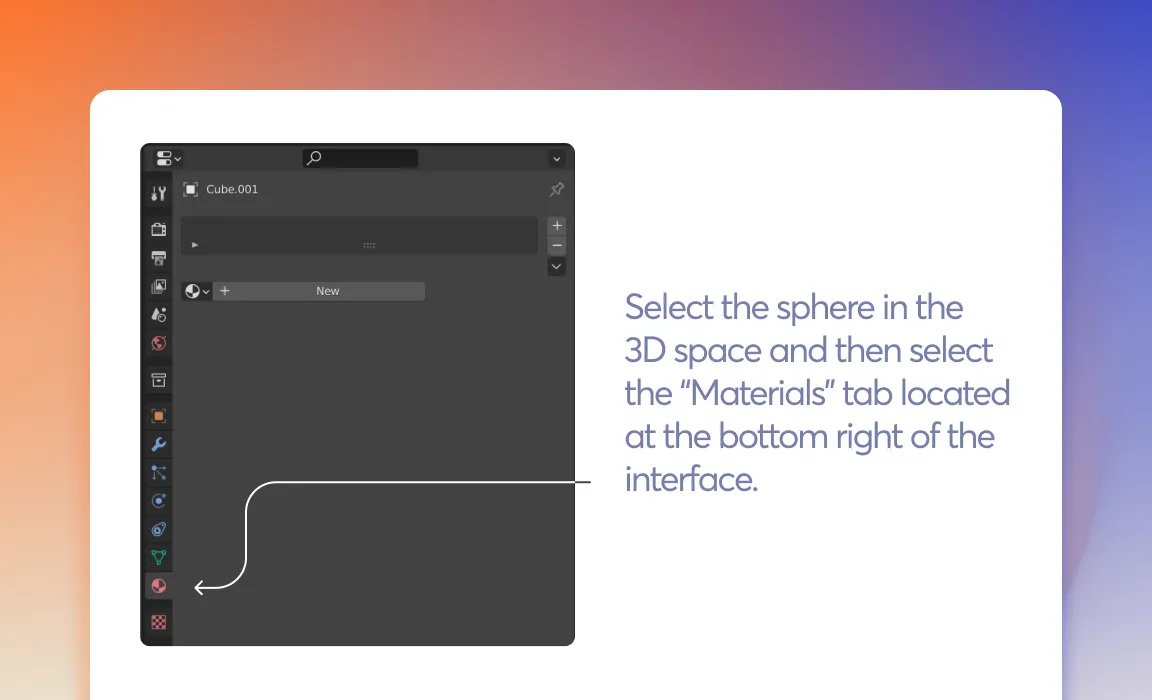
- Click on "New" and rename the material to whatever you like, for instance, "practice."
Add A Texture
There, we have now created a material. In the next step, let us see how we can add a texture to it.
- Go into the shader editor menu, which is placed on the top left corner.

- You will get a node menu that says Principled BSDF.

- You will be able to see lots of parameters in the principled BSDF material.
- These determine the look of your material. For instance, you can change the "Base color" to read from the color wheel.
- To do this, select the area to the right of where it says Base Color in the Principled BSDF Menu.

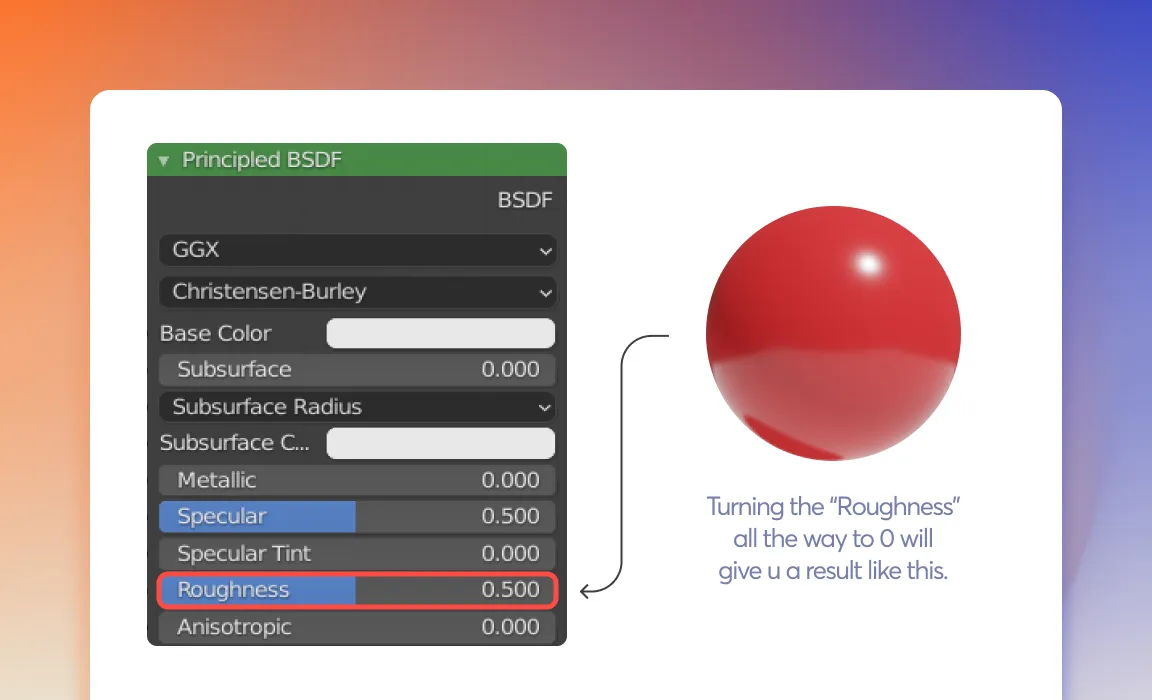
- Turning the "Roughness" to 0 will give you a similar result.
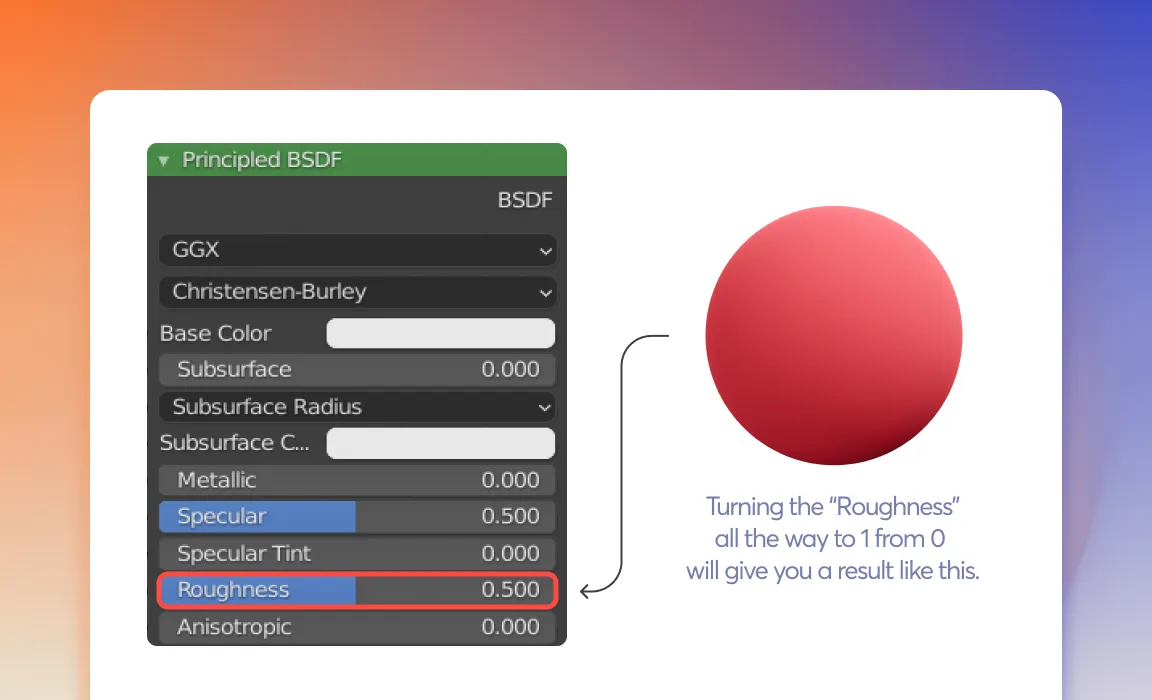
- Turning the "Roughness" to 1 from 0 will give you a result like this.
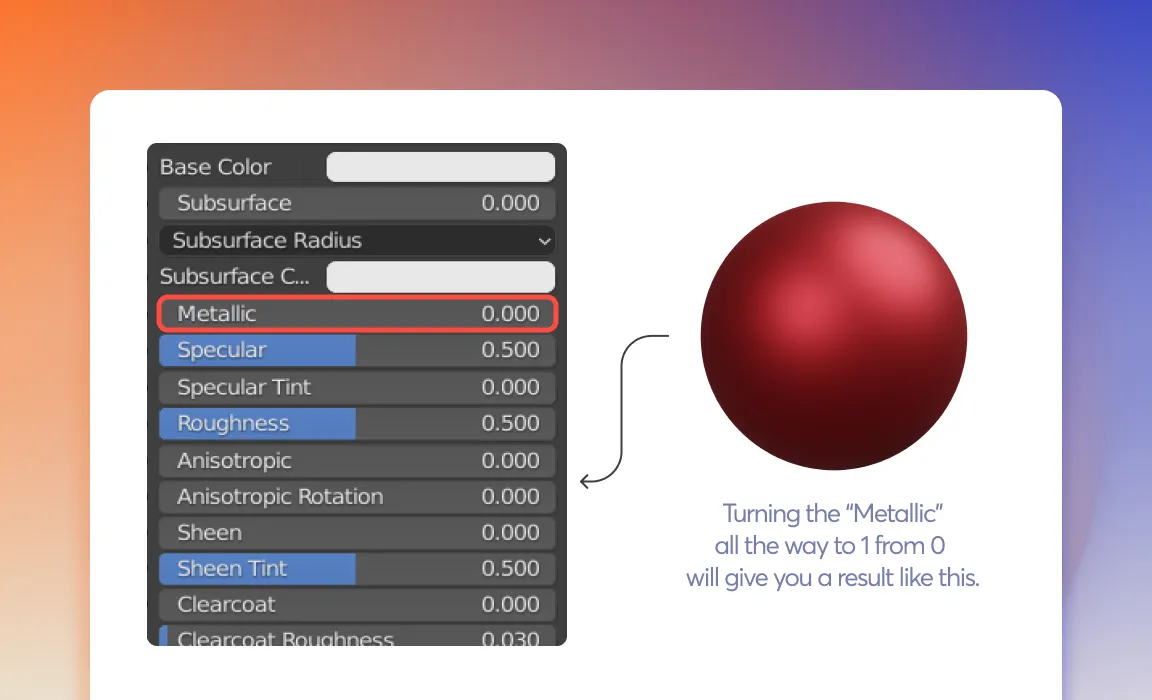
- Changing the metallic parameter will make your material look more metallic and shiny, like in the real world.
Let us try changing the metallic all the way to 1 from 0
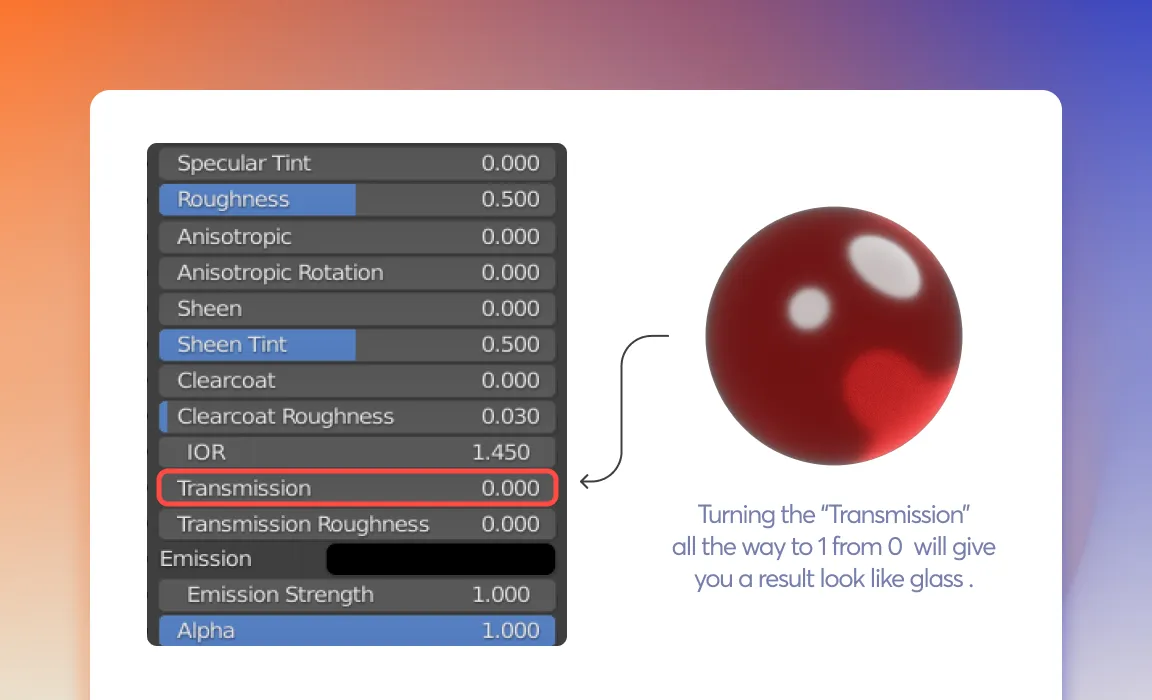
- Adding transmission value will make your material look like glass. To do that, let us turn the transmission to 1 from 0.
Unwrapping The Sphere
Let us UV-Unwrap the object. We unwrap a thing to gain better control of where the texture needs to be. You can think of it like this, when making a cube out of paper, you first make the skeleton on the paper and then fold it into a cube. Similarly, the opposite process of getting the unwrapped cross shape from the 3D cube is called UV-unwrapping. It is essential to our Texturing process.
- Select the sphere. And then let us press "Tab" to go into edit mode.
- Once you are in Edit mode, press "U" on the keyboard to bring up the unwrapping menu.

- Press the "Unwrap" option to unwrap our UV Sphere fully.
- Let us now press the tab again to go back into object mode to add our texture to the material.
Adding A Texture
Once you have created the material, press Shift + F3 to open the shader editor tab, this is where we will be adding our textures to the object.
- Once you are in the shader editor menu, you will be greeted with these two boxes. The box to the left is called the principled bsdf; this is where we will be adding the textures we earlier downloaded from the website.

- Left-click on the principled bsdf box and press Ctrl+T to add a new image texture node.

- Press the "New" option in the Image texture node. You will be taken to a browser. The texture pack you have downloaded in the zip file of the texture pack is split into various channels like Color, Roughness, Normals, etc. These textures define the color, shininess, how bumpy the texture is, etc.
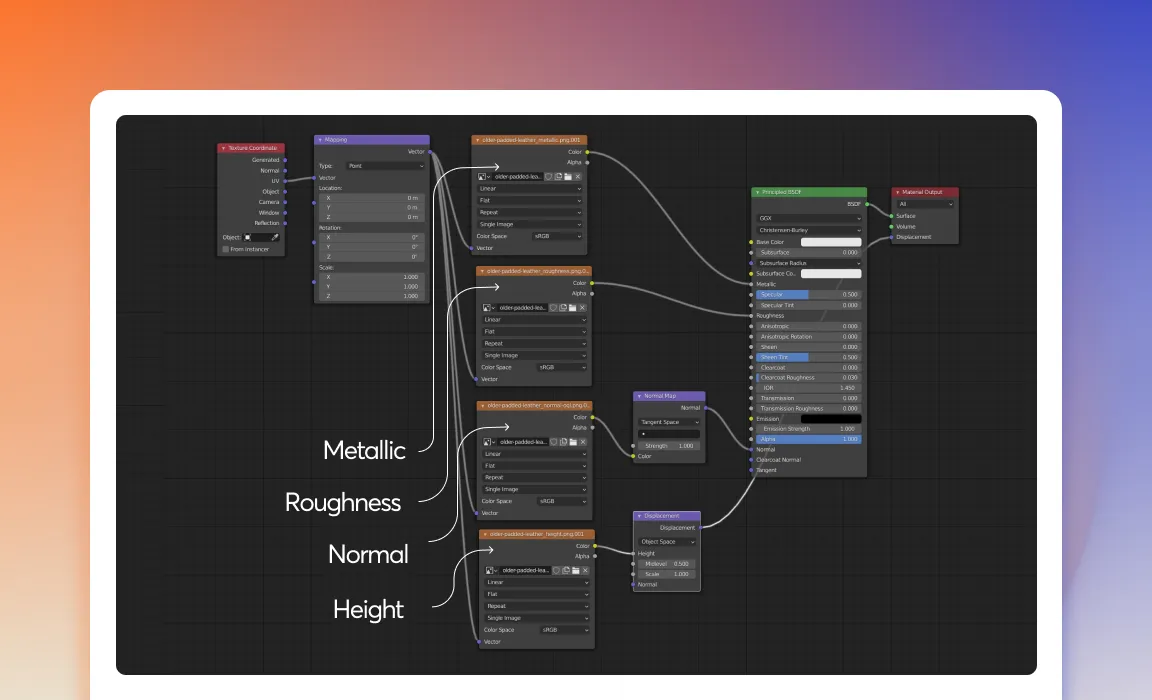
- Create more image texture nodes by press Ctrl+T and assign each node. This is the manual way to do it. You can easily do these in some simple clicks by pressing Ctrl+Shift+T after left-clicking the principled BSDF. Now drag and select all the textures, and they will be assigned automatically.
Rendering The Sphere
To do this, first, let us set up the lights.
- Press Shift+A and then select the "Lights" menu.
- Select a "sun" light.

- Once you have added the lights, press F12 anywhere in the viewport. This will bring up the render view window.
- Once it is done, calculating all the frames. You will get a result like the one you see below.
You have learned how to add a texture by creating material and assigning the appropriate textures to your object. Do not forget to practice it and use it in your projects. You can share with us your experience in our comment section below!
Do visit Iconscout to download from our 3M+ assets library of icons, illustrations, 3D. This massive collection of assets in the form of a library waiting for you, so what are you doing here? Go and check it out right now!
If you have any suggestions or want to be a part of the community, join us at our Community Forum on Discord. We will bring another helpful article next week, till then, Happy Designing!
Share on


Related Blogs

Access the world's largest Design Ecosystem: Assets, Integrations, and Motion.
