How to Make Cloud icon in Adobe Illustrator
Here is a step by step tutorial on how to create a cloud icon on adobe illustrator. Hope you enjoy recreating these!
Hello folks! Today in our new article series ‘Icon Design Tutorial’, we are designing Cloud icon in few simple steps. We are using Adobe Illustrator 2017. We’ll publish two tutorials per week.
After the success of LogoDrop, Iconscout is bringing another plugin Icondrop. Now you can download Icondrop for Sketch, Illustrator, and Photoshop.
Now, let's see the tutorial on how to make a cloud in illustrator.
1. Setup New Document
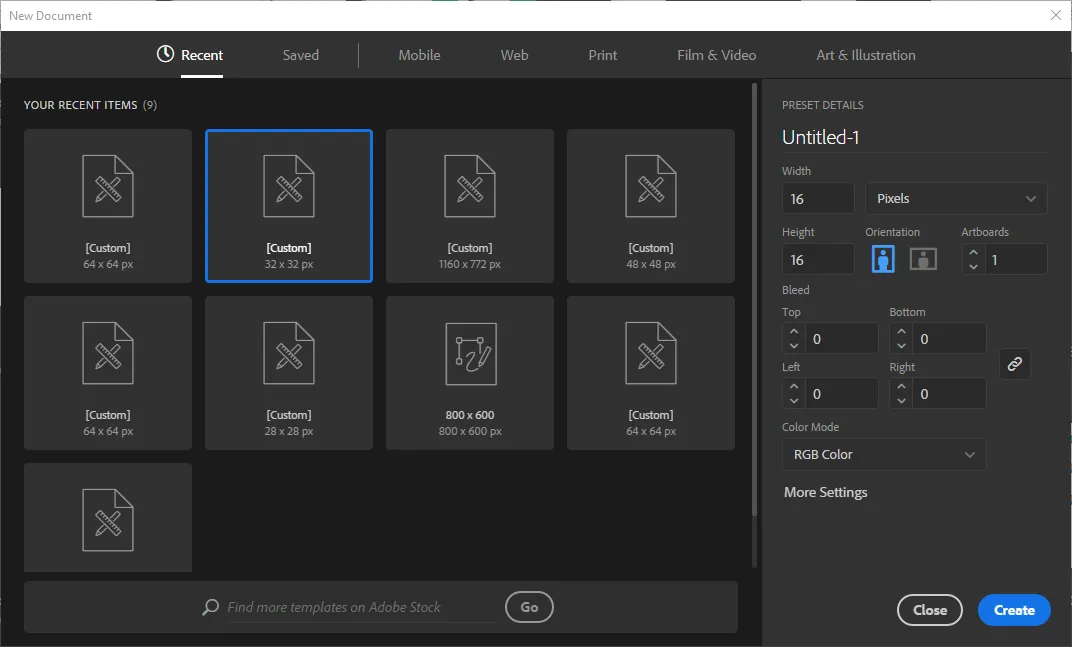
Open Adobe Illustrator. Create a New Document (File -> New or Ctrl+N or Command+N) with the following description:
- Width: 16px
- Height: 16px
- Artboards: 1
- Color Mode: RGB
- Orientation: Vertical (Checked first icon)
2. Setup Grid & Guides
Step 1:
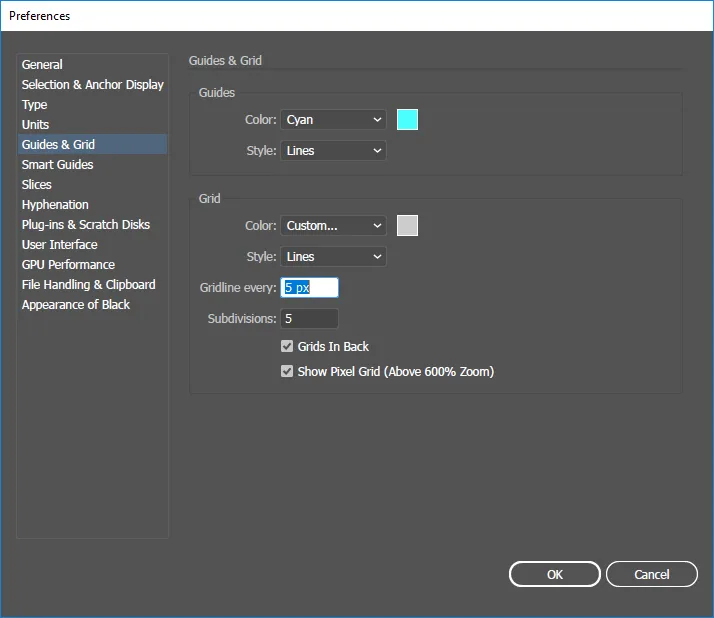
Open Preferences dialog (Edit -> Preferences -> Guides & Grid)
- Gridline every: 5px
- Subdivisions: 5
Step 2:
Please ensure Snap option active.
View -> Snap to Grid & Snap to Point
3. Create Cloud Icon
Step 1:
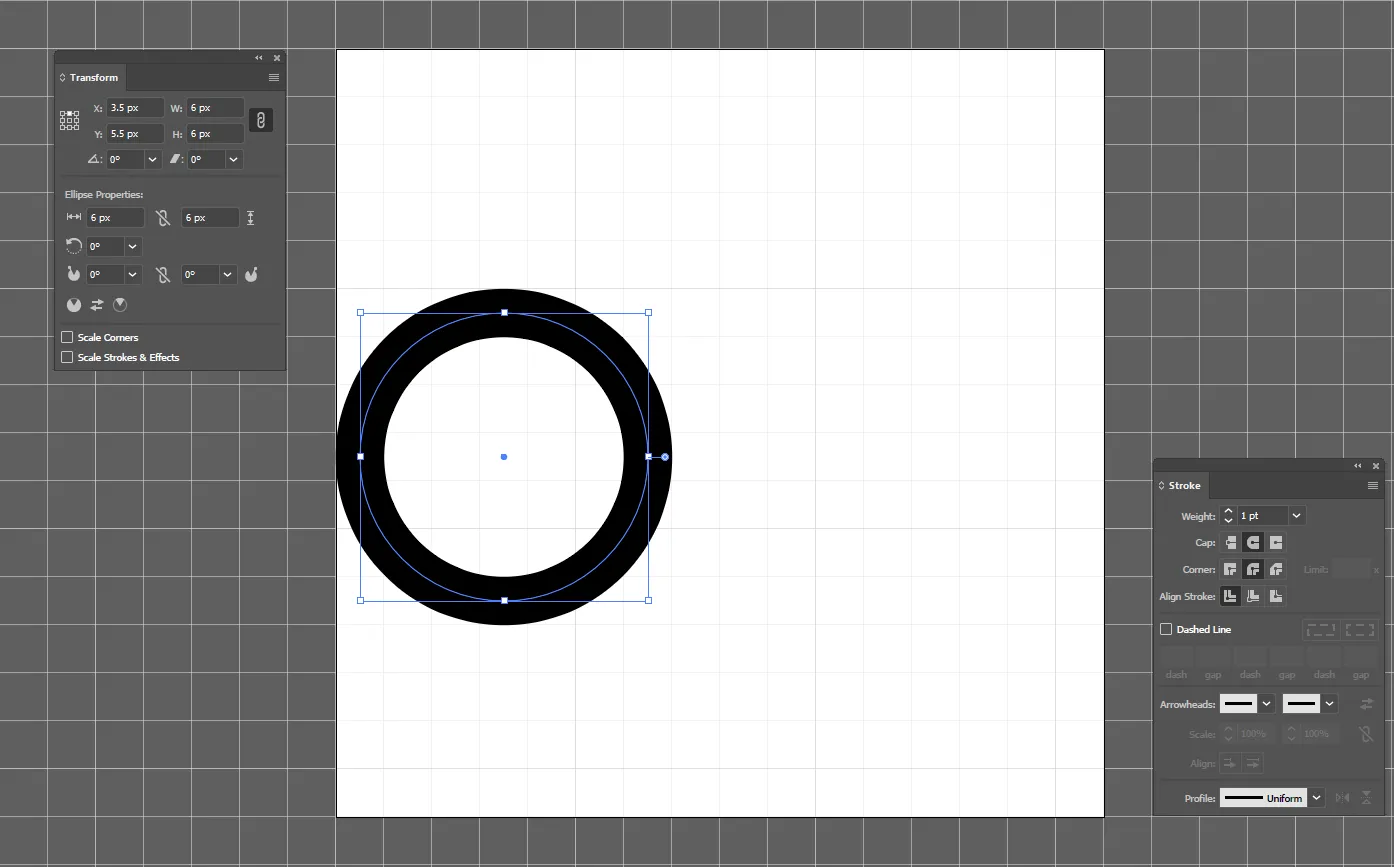
Grab Ellipse tool (L) and create 6 x 6 px first Circle.
- Width: 6px
- Height: 6px
- Stroke: 1px
- Position: X: 3.5px; Y: 5.5px
Step 2:
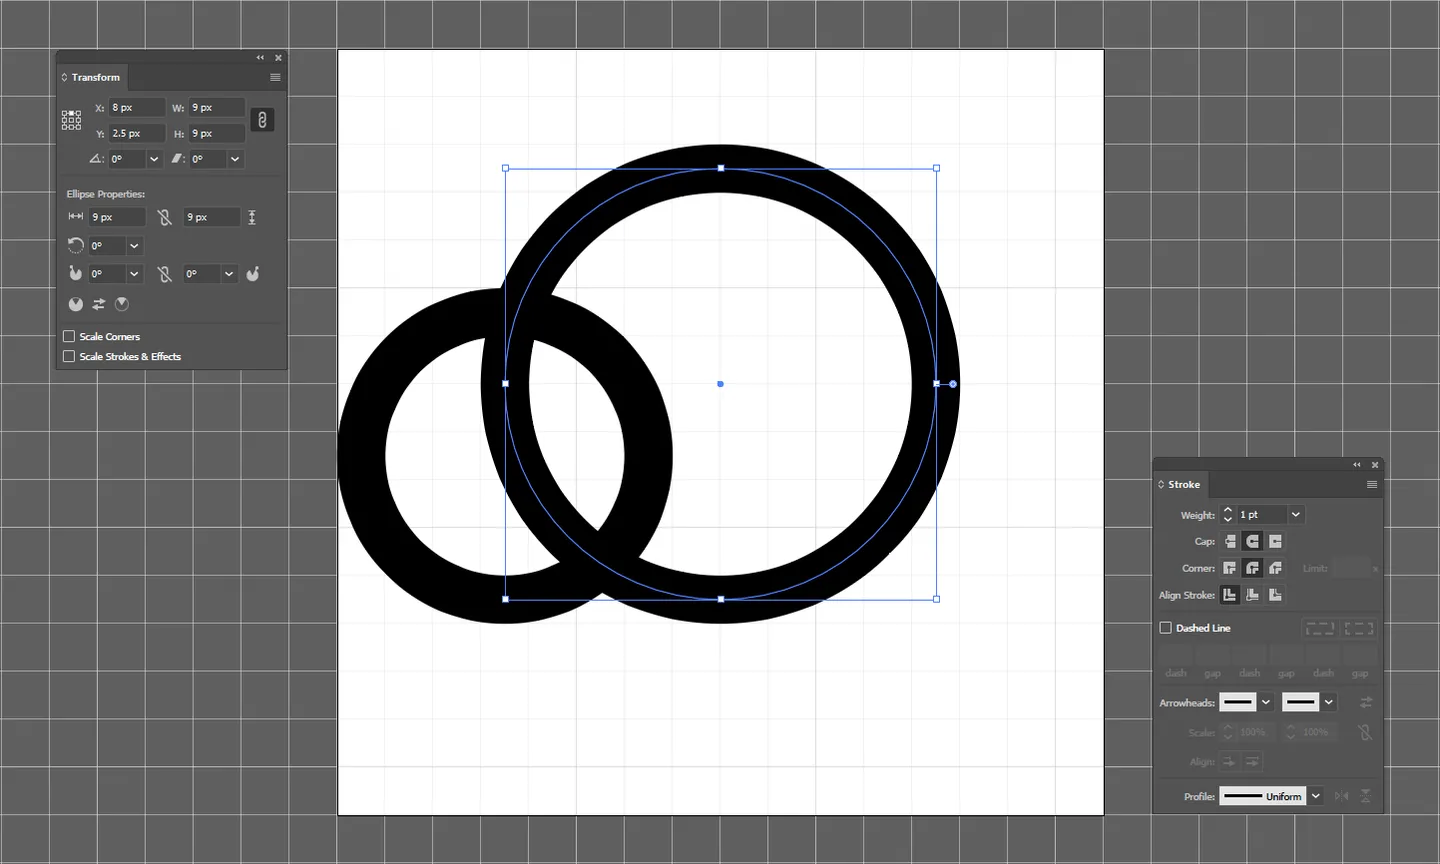
Grab Ellipse tool (L) again and create 9 x 9 px second Circle.
- Width: 9px
- Height: 9px
- Stroke: 1px
- Position: X: 8px; Y: 2.5px
Step 3:
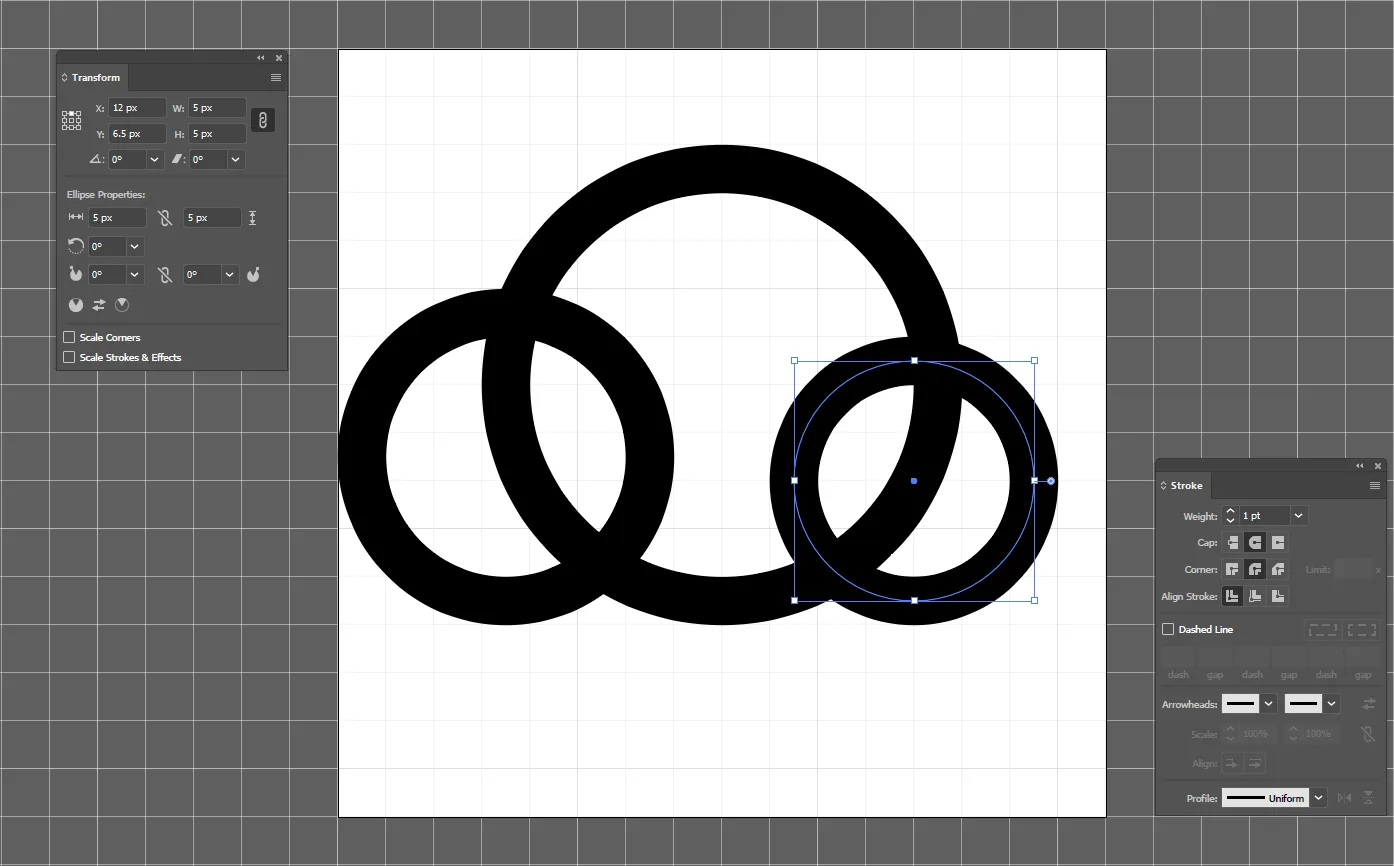
Grab Ellipse tool (L) again and create 5 x 5 px third Circle.
- Width: 5px
- Height: 5px
- Stroke: 1px
- Position: X: 12px; Y: 6.5px
Step 4:
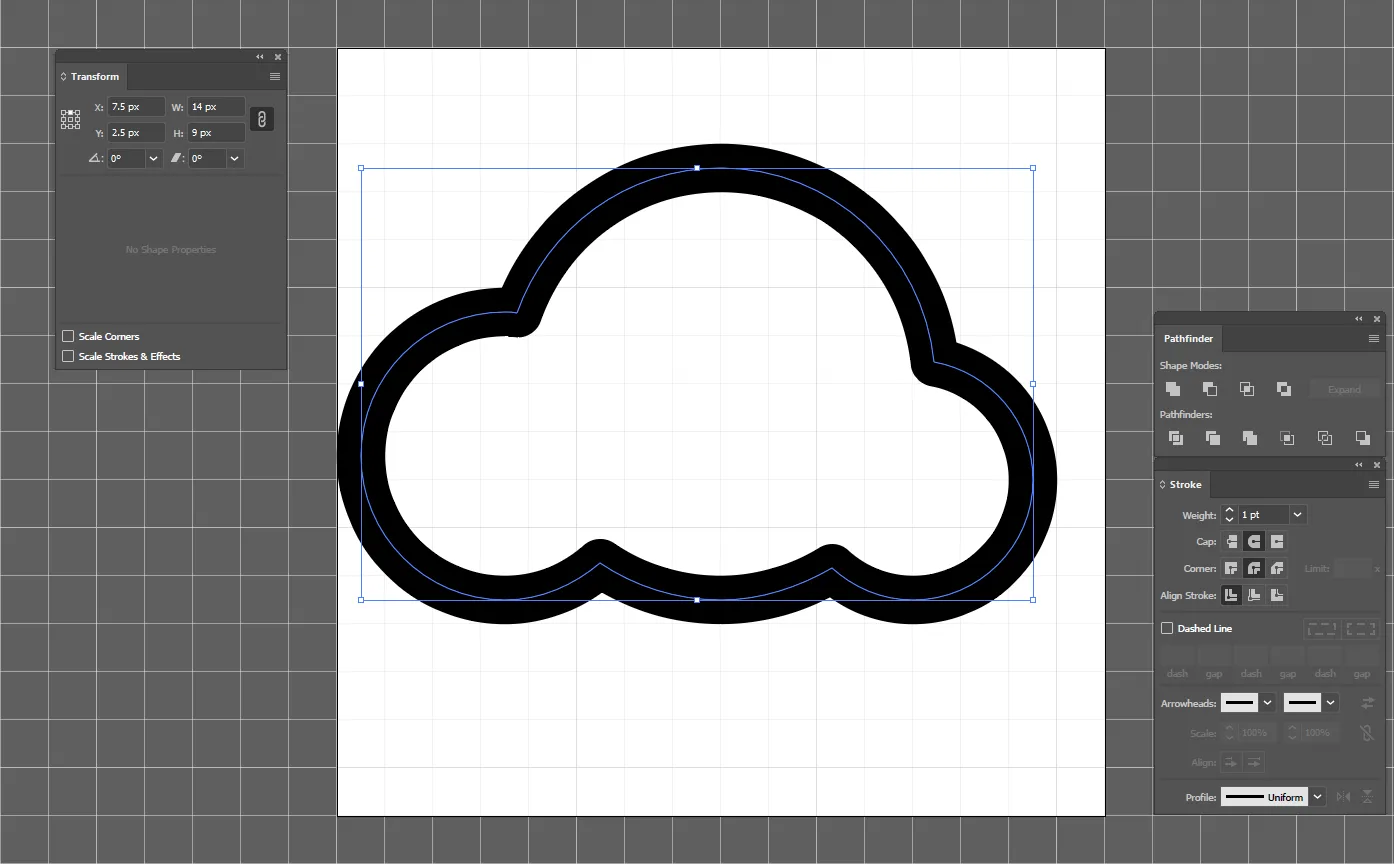
Open Pathfinder from Window -> Pathfinder or Shift + Ctrl + F9.
Select all three circle and perform Unite Operation (First option in Shape Modes) from Shape Modes.
Step 5:
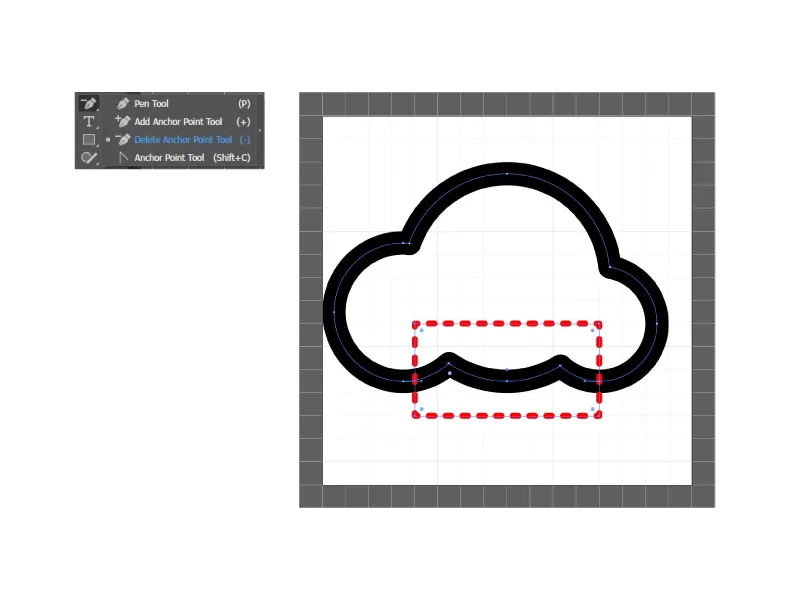
Select Anchor point of shape as shown in the image and then delete those point using Delete Anchor Point Tool (-).
Final Output:

Check out the video tutorial to create Cloud icon in 10 seconds. Follow Iconscout on Instagram and get everyday icon design tutorial.
We hope you’ve found this article helpful. We’d love to hear your thoughts. If you want to request tutorial of any specific icon, please mention it in the comment section below.
Iconscout is giving 50% off on its Pro plans. Now download Unlimited icons from 500,000+ icons in just $14.99. To activate the plan use promo code: NEWUSER.
Also, don’t forget to check our latest article series ‘Design Insights’ where we are covering design process of best Indian startups. Check out our first interview with Razorpay. Don’t forget to share and subscribe! ?
Related Blogs
Access the world's largest Design Ecosystem: Assets, Integrations, and Motion.


